Introduction
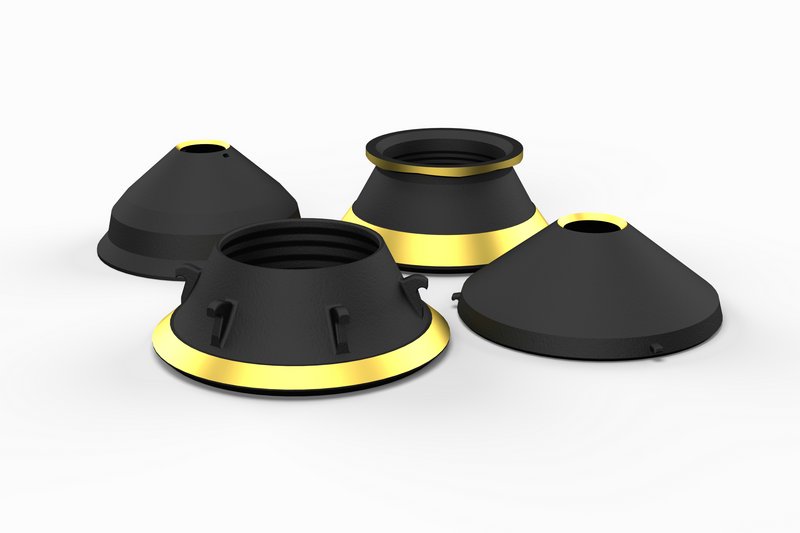
Mantle, covers the head of the crusher to protect it from wear, typical material ZGMn18Cr2
Bowl Liner, secured inside of the bowl to protect it from wear, typical material ZGMn18Cr2
The design of Deya Machinery’s cone crusher wear parts starts with CAD and SolidWorks simulations of the cone crusher cavity, which is the heart of the crushing process.
By computer based planning and continuous quality control of the casting we can guarantee premium material quality, which translates into improved wear life and a higher operational capacity and reliability.
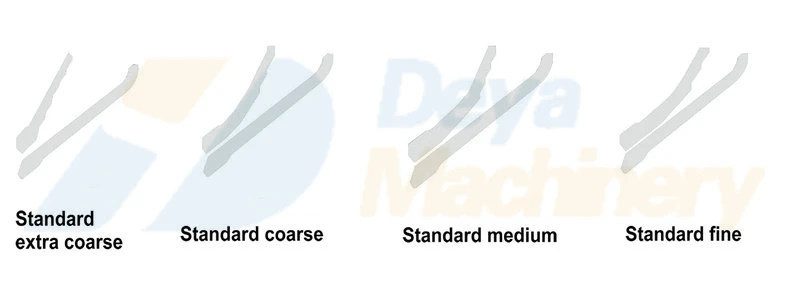
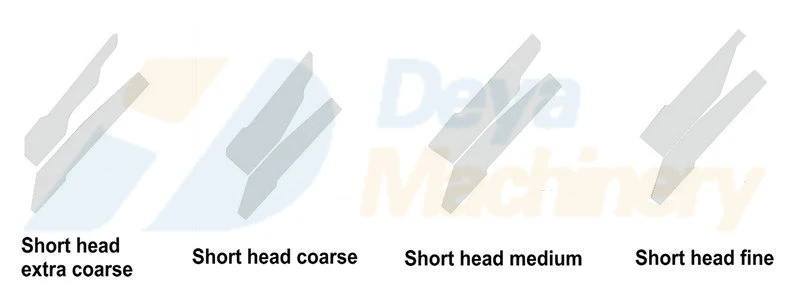
Type of crushing cavity
1. Standard extra coarse, coarse, medium and fine liners
2. Short head extra coarse, coarse, medium and fine liners
When change the mantle and bowl liner?
In order to prevent damage to the liner seating surfaces of the crusher head or bowl, wear parts must be replaced before they are worn through.
In normal conditions, approximately 50% of the liner weight is consumed when liners are worn out. It is important to keep a record of liner wear in order to assess the degree of liner wear without the need to stop the crusher operation.
Production considerations may sometimes favor the changing of wear parts before they are fully worn. Hourly capacity or product quality may decrease towards the end of the liner wear life, and it may be more economical to change the liner before the end of its lifetime.
Typically, distorted wear profiles can cause a reduction in capacity. Other symptoms of abnormal worn liners are high power draw and ring bounce.
Also, the wear life can be reduced because the wear is sometimes concentrated in a small zone rather than spread along the full cavity, and the cavity may have to be replaced before it is fully worn. This results in poor utilization and higher operating wear costs.
How to change the mantle and bowl liners?
Always follow the safety instructions from Deya Machinery during all maintenance and lifting work.
Bowl removal
1. Depressurize the clamping circuit
2. Turn out bowl
3. Remove bowl from machine, and worn liner from bowl
• Inspect, clean and regrease threads on bowl and adjustment ring
• Remove wedges
• Lift bowl free of worn liner
Bowl installation
1. Clean, inspect bowl
• Remove any backing stuck to the bowl
• Grind smooth any ridges on seat
• Oil inside of bowl to prevent backing from sticking
2. Bowl liner preparation
• Chalk line above high points of bowl liner helix
• Clean seating surface of bowl liner
3. Installation of new bowl liner
• Make sure bowl liner is centered in bowl
• Replace wedges
• Tighten in criss-cross pattern: check seat area with feeler gauge, pour backing if required and place insulation around wedges
Mantle removal
1. Remove feed plate
2. Lift head assembly out of the machine
3. Cut the torch ring
4. Use sledging wrench to loosen locking nut
5. Weld lift lugs to mantle
6. Lift worn mantle from head
New liner preparation
1. Check head seat surface
2. Check threads on head bolt, locking nut
3. Clean mantle mating surfaces of mantle and torch rings
New mantle installation
1. Center mantle on head
2. Tighten locking nut
3. Mark vertical line
4. Heat seating area of mantle
5. Tighten locking nut again
6. Pour backing
7. Weld torch ring to mantle and mantle to locking nut

